This year, Chef Andrew Smith, Culinary Director, curated our Food Festivals and prepared some delicious recipes to help celebrate each ingredient!
In June, we’re celebrating strawberries!
Strawberry Chutney
Ingredients
- 1 pint strawberries tip removed and cut in half length wise
- 2 tbs shallots finely chopped.
- 1 tsp sugar
- 1Tbs chopped mint. Reserving remaining mint whole
- 1 tbs white wine vinegar
- 1 tsp cooking oil
- 1tbs water
Method
On a grill or cast-iron grill pan char strawberries cut side down then remove to bowl. In a small sauce pot over medium heat shallots and mint in cooking oil till shallots become translucent. And in strawberries, sugar, vinegar, and water. Reduce heat to low and cook mixture until strawberries start break down taking care to stir mixture to prevent burning. Remove from heat and allow to cool.
About Chefs’ Choir®
A chorus of culinary voices from Great Performances—our chefs step out of the kitchen to share recipes, stories, and inspiration. Learn more →
Chefs Anastassia Batsoula-Deuel and Mike Deuel love grilling vegetables in their back yard — and we suspect that as the growing season kicks off, they’ll be grilling a lot of their own produce! This powerhouse chef couple met while working at GP, and it’s one of our favorite GP love stories! The recently welcomed their daughter, Mila, to the family and we couldn’t be more delighted.
Here they share a recipe for Whole Grilled Cabbage with Garlic Butter & Chili Crisp – a perfect celebration of one of our favorite brassicae. The savory, spicy butter sauce is a delightful complement to the smokey, naturally sweet cabbage and is a sleeper hit at any occasion. Serve as the centerpiece to a meal or as a delectable side dish. We’re pretty sure you there won’t be any leftovers with this dish!
Cooking Whole Vegetables Over Fire: Our Favorite Way to BBQ as a Household of Chefs
We’ve worked in a lot of kitchens over the years—some bustling and loud, some calm and rustic—but our favorite kitchen is still the one in our backyard. There’s something grounding about stepping outside with a glass of something cold, firing up the grill, and cooking with simple, seasonal ingredients. And lately, our favorite way to cook is with big, bold vegetables, straight on the coals.
Whole cabbages, butternut squash halves, giant potatoes—we love how these humble ingredients transform over fire. They don’t ask for much. A little oil, some seasoning, and time. What you get in return is flavor that’s smoky, sweet, a little charred at the edges, and deeply satisfying.
We started grilling whole vegetables out of curiosity and ended up falling in love with the ritual. Cabbage became a star in our home—soft in the middle, smoky outside, with enough structure to slice into wedges like a roast. There’s a kind of magic that happens when you let the fire do its thing.
Here’s one of our go-to recipes, usually made while our daughter picks herbs from the garden and our dog lurks hopefully near the grill.
Grilled Whole Cabbage with Garlic Butter & Chili Crisp
by Chef Anastassia Batsoula-Deuel and Chef Mike Deuel
Serves 2-4
Ingredients
- 1 whole cabbage (we like green or savoy)
- Olive oil
- Kosher salt & freshly ground black pepper
- 4 tbsp unsalted butter
- 2 cloves garlic, minced
- 1–2 tbsp chili crisp (we don’t fight over this—we just add more)
- Optional: a splash of soy sauce or lemon juice for brightness
Procedure
- Prep Together We trim the cabbage, keeping the core intact so it stays together. Then rub it with olive oil, salt, and pepper. One of us handles the cabbage; the other pours the wine.
- Wrap & Roast Wrap the cabbage in foil—tight like a gift—and place it over indirect heat on the grill (around 375°F). We close the lid and let it roast for about an hour, rotating now and then.
- Char It Unwrap the cabbage and place it directly over the flames for 5–10 minutes. That charred outer layer? Don’t fear it. That’s flavor.
- Make Garlic Butter While one grills, the other melts butter in a small pan, adds garlic, then stirs in chili crisp. Sometimes we add soy sauce or lemon—depends on our mood.
BBQing whole vegetables has become a small, shared ritual for us. No timers, no plating stress—just the joy of watching something transform, together. And we’ll be honest: this cabbage recipe has quietly stolen the show at more than one cookout.
More Recipes by Chef Anastassia Batsoula-Deuel and Chef Mike Deuel
About Chefs’ Choir®
A chorus of culinary voices from Great Performances—our chefs step out of the kitchen to share recipes, stories, and inspiration. Learn more →
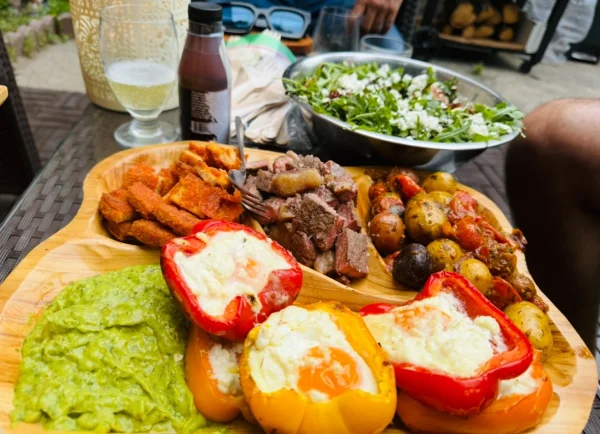
This month, Chef Tatiana Iglesias shares a delicious recipe perfect for an outdoor brunch or breakfast for dinner: Grilled Eggs in Bell Peppers with Guacamole. The sweet bell peppers pick up a savory smokiness from the grill, and are the perfect vessel for grilled eggs. You can easily adjust this recipe for however many people will gather around the table, and it’s a great addition to any brunch spread. Chef Tatiana’s brunch options included grilled steak, roasted baby potatoes with cherry tomatoes and garlic, arugula salad with radishes and goat cheese, and a vegan breaded chik’n cutlet.
One of the reasons I love summer so much is because it gives me an excuse to grill as often as possible. There’s something really special about gathering with friends and family, enjoying the outdoors, and sharing a meal made with love. That simple act of being together, with good food and free time, brings me so much joy.
Grilling is more than a cooking method to me; it’s a way to slow down, connect, and savor the moment. And one of my favorite simple grilling recipes is these grilled bell peppers filled with eggs. They’re fresh, fun, and perfect for a weekend brunch or casual summer get-together.
Grilled Eggs in Bell Peppers with Guacamole
by Chef Tatiana Iglesias
Serves 2-4
Ingredients
- 2 large bell peppers, halved lengthwise and seeds removed
- 4 eggs
- Olive oil
- Salt and pepper
- Optional toppings: chopped scallions, chili flakes, fresh herbs
For the Guacamole
- 2 ripe avocados
- Juice of 1 lime
- 1 small clove of garlic, finely grated or minced
- Salt
- Optional: chopped cilantro, diced tomato, minced jalapeno
Procedure
- Preheat your grill to medium heat
- Lightly brush the outside of the bell pepper halves with olive oil and place them on the grill, cut side up
- Carefully crack one egg into each pepper half. Close the lid and grill for 10-12 minutes, or until the whites are set and the yolks are cooked to your liking.
- While the peppers are grilling, prepare the guacamole. Mash the avocados with lime juice, garlic, and salt. Add any optional mix-ins you like.
- Serve the grilled eggs hot, with a generous scoop of guacamole on the side.
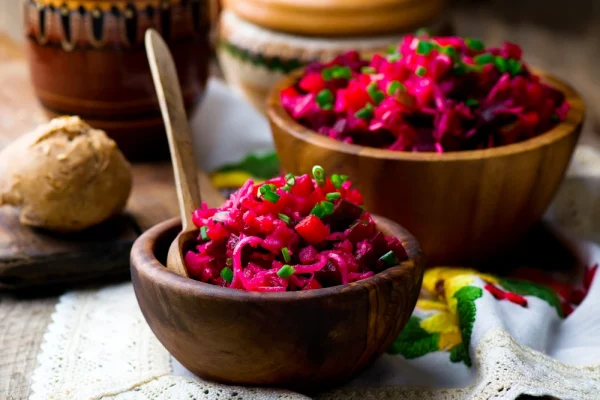
Here’s a recipe my mom always makes. It’s tasty, healthy, vegan and beautiful on the table.
Russian Vinaigrette, we call Vinegret, is a classic Russian salad featuring diced cooked beets, potatoes, carrots, pickles,sweet peas, scallions and dill. Dressed with a simple seasoning of oil, salt and pepper. It’s on the table of most family holidays. Always made by my mom. Best made the day before so the beets have time to release their color.
Ingredients
- 5 medium beets
- 3 medium carrots
- 3 medium potatoes
- 4-5 pickles
- 1 can sweet peas, drained
- 1 bunch scallions
- 1/4 bunch Dill
- Oil of your choosing
- Salt & Pepper to taste
Procedure
- In a medium pot boil beets for about 1 hour or until they are tender.
- In a separate pot, boil whole potatoes and carrots in their skins for about 30 minutes or until a knife goes in smoothly.
- Drain the vegetables and let them cool to room temp.
- Peel the skins from the potatoes, beets and carrots, easiest to do with a pairing knife. Dice the beets, potatoes, carrots and pickles into a big bowl.
- Mix everything together, adding scallion, dill, oil, salt, pepper and vinegar(if using) to taste. Refrigerate until ready to eat, tasting once more for seasoning before serving.
As the days stretch long and golden, our palates begin to crave what the season gives us in abundance: freshness. This summer, cocktails are getting a verdant twist, with bartenders and home mixologists leaning into the beauty of botanicals, the brightness of citrus, and the aromatic charm of fresh herbs.
Gone are the days when summer drinks were just sweet and boozy. Today’s cocktails are layered, balanced, and inspired by the garden — drawing flavor from rosemary sprigs, lavender buds, basil leaves, and cucumber slices. Whether it’s a lavender lemonade spritz or a basil-infused margarita, these herbaceous additions bring complexity and a dose of natural elegance to your glass.
Citrus is, of course, a summertime staple, but this year, it’s not just about squeezing in a wedge of lime. Citrus is being reimagined — infused into syrups, muddled with fresh herbs, or paired with floral liqueurs to create drinks that are as beautiful to look at as they are refreshing to sip.
To celebrate this botanical trend, we’re thrilled to feature a summer cocktail from our restaurant partner Clara, located inside the New York Historical. This Cucumber and Rosemary Gin and Tonic is the kind of drink you want in hand while lounging on a terrace or watching the sun dip behind the skyline. It’s crisp, herbal, and subtly sweet — a perfect summer pour.
Cocktail Recipe: Cucumber and Rosemary Gin & Tonic
Ingredients
- 1.5 oz Beefeater London Dry Gin
- 3 cucumber slices, muddled
- 1 oz rosemary lemon syrup (recipe below)
- Tonic water, to top
- Cucumber slice, for garnish
Procedure
- Muddle cucumber slices in a shaker.
- Add gin and rosemary lemon syrup, then shake with ice.
- Strain into a glass filled with fresh ice and top with tonic water.
- Garnish with a cucumber slice.
Rosemary Lemon Syrup
Ingredients
- 1/4 cup water
- 1/4 cup sugar
- 1 rosemary sprig
- Juice of 1/2 lemon
Procedure
Combine water, sugar, and rosemary in a small saucepan. Bring to a simmer, stirring until sugar dissolves. Remove from heat, stir in lemon juice, and let steep until cool. Strain and store in the fridge for up to one week.
This cocktail is summer sophistication in a glass — crisp cucumber coolness meets the depth of rosemary and the brightness of lemon, with the gin’s botanicals tying everything together. It’s a refreshing way to embrace the season’s flavors while keeping things simple and elegant.
Whether you’re crafting drinks at home or looking for inspiration for your next event, don’t be afraid to experiment with the contents of your garden or windowsill herb box. Summer’s here — and it tastes like rosemary and sunshine.
More Cocktail Inspiration
This year, Chef Andrew Smith, Culinary Director, curated our Food Festivals and prepared some delicious recipes to help celebrate each ingredient!
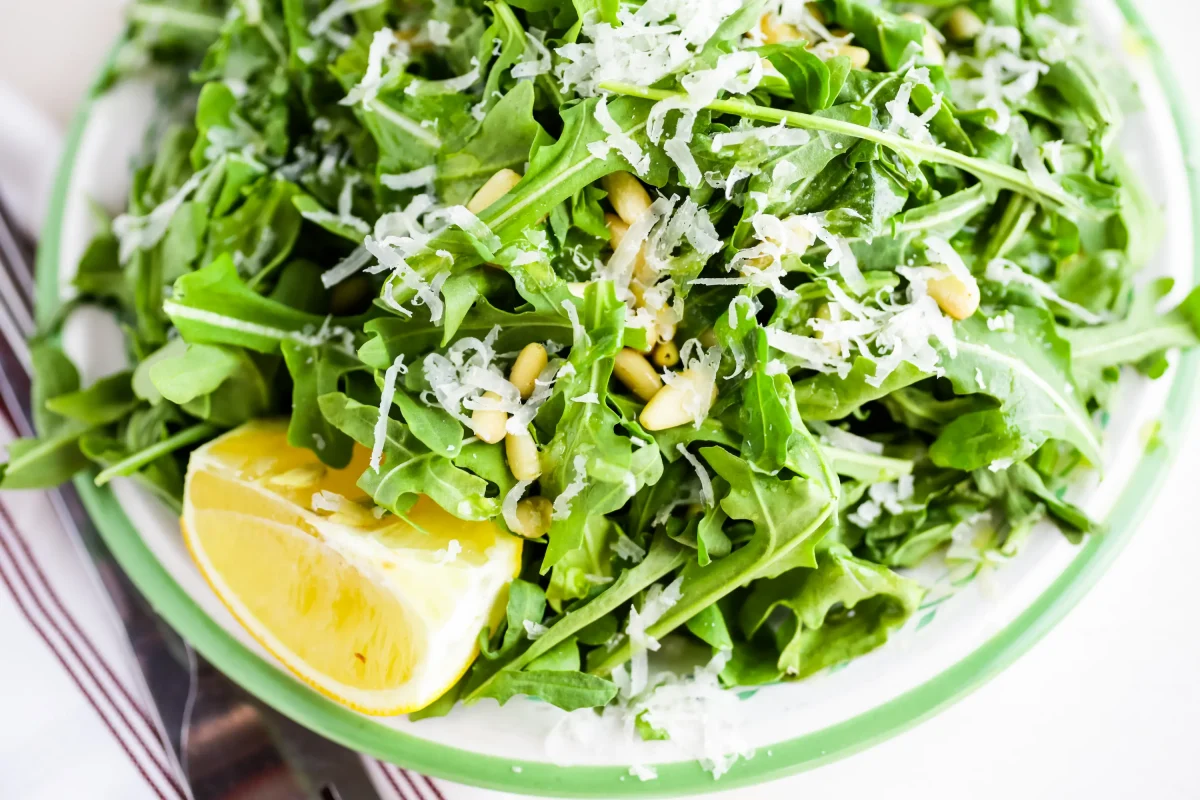
For the month of May, we’re celebrating Arugula. Often overlooked in favor of more familiar leafy greens, arugula brings a bold, peppery flavor and a ton of personality to any dish. Whether tossed into salads, layered on sandwiches, or blended into pestos, this vibrant green adds more than just taste—it’s also packed with nutrients.
Chef Andrew has shared a crisp, flavorful Arugula and Pine Nuts Salad recipe that is perfect for Spring.
Arugula and Pine Nuts Salad
Ingredients
- ¼ pound fresh arugula
- 2 tbs grated pecorino Romano
- 2 tbs toasted and chopped pine nuts
- 2 tsp fresh lemon juice
- 2 tsp EVOO
- TT Fresh cracked black pepper
- TT salt
Method
In a mixing bowl place, all ingredients and gently toss till thoroughly incorporated. Season with salt and fresh cracked pepper to taste. Place on serving vessel and serve immediately.
At Great Performances, food is woven into every moment from a quick coffee break to a grand celebratory feast. We bring this belief to life through delicious food, warm hospitality, and boundless culinary creativity. At the heart of it all is our Chefs’ Choir℠ ensemble – a unique and diverse group of extraordinary chefs and cooks who power our catering, café, and restaurant services. With their diverse talents, perspectives, and culinary expertise, they shape the unforgettable menus that define our events, from corporate gatherings and nonprofit galas to weddings and milestone celebrations; and that feed our diners at our cafés and restaurants.
Through the Chefs’ Choir℠ ensemble, our chefs step beyond the kitchen to share their passion and expertise directly with you. They offer recipes to try at home, stories that inspire, insights into their craft, and tips to elevate your cooking. Whether you’re looking to recreate a signature dish, explore new techniques, or simply find fresh inspiration, the Chefs’ Choir℠ ensemble brings the artistry and creativity of Great Performances into your home, making every meal a celebration.
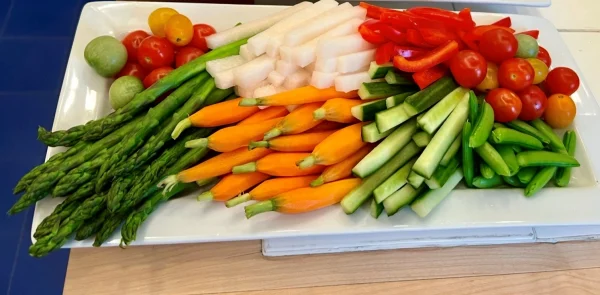
Chef Tatiana Iglesias shares some tips for celebrating Earth Day with locally sourced vegetables for a delicious and healthy crudite platter.
Celebrate Earth Day with Local Spring Flavors
Earth Day is a reminder that the way we eat impacts the planet. Choosing local produce supports farmers, reduces carbon emissions, and gives you fresher, more flavorful food. Spring is the perfect time to celebrate seasonal eating with this vibrant crudité platter and beet hummus.
Spring Crudité with Beet Hummus Recipe
Ingredients:
- 1 cup sugar snap peas
- 1 bunch radishes, halved
- 1 cup baby carrots
- 1 cup asparagus, blanched
- 1 cup cucumber, sliced
- 1 cup cherry tomatoes
For the Beet Hummus
- 1 roasted beet, peeled and chopped
- 1 can chickpeas (15 oz), drained and rinsed
- 2 tbsp tahini
- 2 tbsp olive oil
- Juice of 1 lemon
- 1 garlic clove
- Salt and pepper to taste
Method:
- Make the hummus – Blend all hummus ingredients until smooth. Adjust seasoning to taste.
- Prepare the crudité – Arrange the vegetables on a platter.
- Serve – Add the hummus to the center and enjoy!
Eating local helps the planet and makes your meals taste better. This Earth Day, savor the season and support your local farmers!
At Great Performances, food is woven into every moment from a quick coffee break to a grand celebratory feast. We bring this belief to life through delicious food, warm hospitality, and boundless culinary creativity. At the heart of it all is our Chefs’ Choir℠ ensemble – a unique and diverse group of extraordinary chefs and cooks who power our catering, café, and restaurant services. With their diverse talents, perspectives, and culinary expertise, they shape the unforgettable menus that define our events, from corporate gatherings and nonprofit galas to weddings and milestone celebrations; and that feed our diners at our cafés and restaurants.
Through the Chefs’ Choir℠ ensemble, our chefs step beyond the kitchen to share their passion and expertise directly with you. They offer recipes to try at home, stories that inspire, insights into their craft, and tips to elevate your cooking. Whether you’re looking to recreate a signature dish, explore new techniques, or simply find fresh inspiration, the Chefs’ Choir℠ ensemble brings the artistry and creativity of Great Performances into your home, making every meal a celebration.
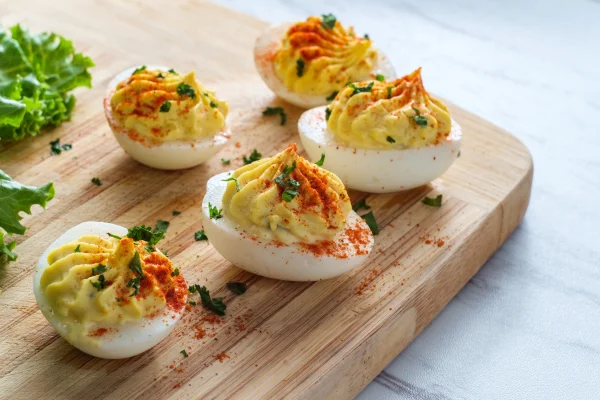
Chef Mike Deuel shares his recipe for Pimento Cheese Deviled Eggs – a crowd favorite and delish for Easter (or any other time you have folks coming over!)
Chef’s Note: These deviled eggs aren’t just a snack — they’re a power move. Each bite is creamy, smoky, tangy, and just fiery enough to leave an impression. Control the heat. Command the flavor. Serve with confidence.
Ingredients:
- 6 large eggs
- ¼ cup sharp cheddar cheese, finely grated
- ¼ cup cream cheese, softened
- 2 tbsp mayonnaise
- 2 tbsp pimentos, finely diced
- 1 tsp Dijon mustard
- ½ tsp smoked paprika, plus extra for garnish
- A dash of hot sauce (because life needs heat)
- Salt and freshly ground black pepper to taste
- Chives or parsley for garnish (optional)
Method:
- Command the Boil: Place your eggs in a single layer in a pot and cover with cold water. Bring to a rolling boil over medium-high heat. The second that water hits a boil, remove the pot from heat, cover, and let the eggs sit for 10 minutes. Precision is key.
- Ice Bath Ritual: Transfer the eggs into an ice bath immediately — shock them into submission. Let them chill for about 5 minutes. This ensures clean peeling and perfectly set yolks.
- Separate and Conquer: Peel the eggs, slice them in half lengthwise, and gently pop the yolks into a mixing bowl. Set the whites aside on a serving platter, pristine and waiting.
- Craft the Filling: Mash the yolks with a fork until smooth. Add cheddar, cream cheese, mayo, pimentos, Dijon mustard, smoked paprika, and a dash of hot sauce. Stir with purpose, ensuring every element fuses into a bold, creamy mixture. Season with salt and pepper to taste.
- Pipe with Precision: Transfer the filling into a piping bag (or a zip-top bag with the corner snipped) and pipe the mixture into the egg whites. Every swirl should feel intentional — a statement.
- Garnish and Serve: Dust each egg with a final whisper of smoked paprika. For a little drama, add finely chopped chives or parsley. Serve immediately, or chill for up to an hour if you want the flavors to deepen and smolder.
At Great Performances, food is woven into every moment from a quick coffee break to a grand celebratory feast. We bring this belief to life through delicious food, warm hospitality, and boundless culinary creativity. At the heart of it all is our Chefs’ Choir℠ ensemble – a unique and diverse group of extraordinary chefs and cooks who power our catering, café, and restaurant services. With their diverse talents, perspectives, and culinary expertise, they shape the unforgettable menus that define our events, from corporate gatherings and nonprofit galas to weddings and milestone celebrations; and that feed our diners at our cafés and restaurants.
Through the Chefs’ Choir℠ ensemble, our chefs step beyond the kitchen to share their passion and expertise directly with you. They offer recipes to try at home, stories that inspire, insights into their craft, and tips to elevate your cooking. Whether you’re looking to recreate a signature dish, explore new techniques, or simply find fresh inspiration, the Chefs’ Choir℠ ensemble brings the artistry and creativity of Great Performances into your home, making every meal a celebration.
Adam Kaye, co-founder of The Spare Food Co. recently partnered with The Sylvia Center to curate the menu for their Art of Cooking Gala. This month, in celebration of The Sylvia Center and sustainability, he shares some recipes that ensure full utilization of ingredients including a carrot top pesto, a radish greens aioli, and a fermented beet greens.
Carrot Top Pesto Recipe
Ingredients
- 3 cups carrot tops, rinsed and chopped
- ½ cup basil
- ¼ cup grated parmesan cheese
- ½ cup nuts (walnuts, almonds, pinenuts, etc.)
- 1 garlic clove, smashed
- 1.5 cups vegetable oil, chilled
- salt and pepper to taste
Method
- Bring a medium pot of well-salted water to a boil. Fill a mixing bowl with iced water.
- Blanch the carrot tops in the boiling water for 1 minute. Add the basil, stir and cook for another 30 seconds. Strain the greens over a colander in the sink. Immediately plunge into the bowl of ice water. Chill completely.
- Drain the blanched greens. Squeeze out as much of the water as possible and roughly chop on a cutting board.
- Place the blanched, chopped greens into a blender with the remaining ingredients.
- Puree on high for about 1 minute until you have a smooth, bright green pesto. Season with salt and pepper as needed.
- Serve or chill immediately.
Radish Greens Aioli
Ingredients
- 3 cups radish greens (or turnip greens), washed and chopped
- 1 cup Italian parsley leaves, roughly chopped
- ½ cup tarragon leaves, roughly chopped
- 6 cornichons
- ½ tsp minced garlic
- 1.5 Tbsp Dijon mustard
- 2 soft cooked eggs (5-6 minute boiled egg, chilled and peeled)
- 1 – 1.25 cups vegetable oil (grapeseed or blended olive oil)
- salt and pepper to taste
Method
- Combine the cornichons, garlic, mustard and eggs in a blender.
- With the blender running, very slowly add the oil to emulsify.
- Add the greens and herbs to the blender and puree until smooth and emulsified and you have a green aioli
- Season with salt and pepper. If needed, add a splash of cornichon liquid for more acidity.
- Chill immediately
Fermented Beet Greens Condiment
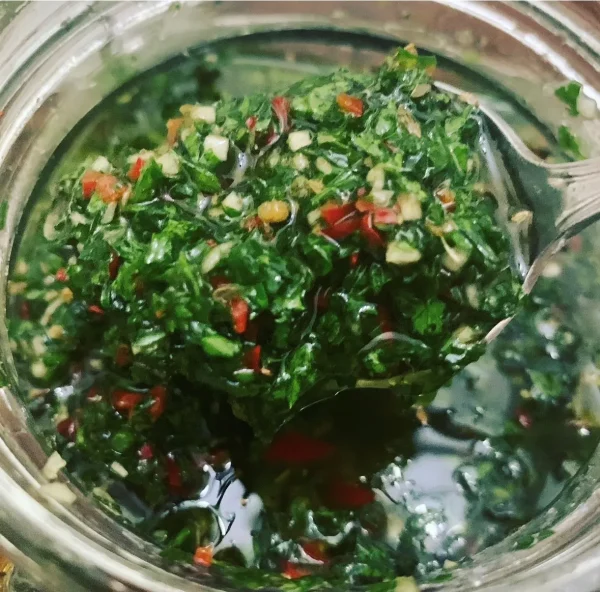
The idea here is to incorporate some finely chopped fermented beet greens into a green sauce that you might already make. I’m thinking along the lines of an Italian Salsa Verde or Chimichurri or Chermoula or Zhoug – I think something that has some heat and spice would be nice as a contrast to the other two green sauces.
Prepare the fermented beet greens as though you were making sauerkraut. You can check out Adam’s video for Watermelon Rind Sauerkraut on Instagram here.
- wash and chop the beet greens
- mix well with coarse salt (2% weight of the greens)
- it should get liquidy; if it isn’t creating enough liquid, add a little 1.5% salt brine
- press down, cover, and allow to ferment at room temperature for about a week
This year, Chef Andrew Smith, Culinary Director, curated our Food Festivals and prepared some delicious recipes to help celebrate each ingredient!
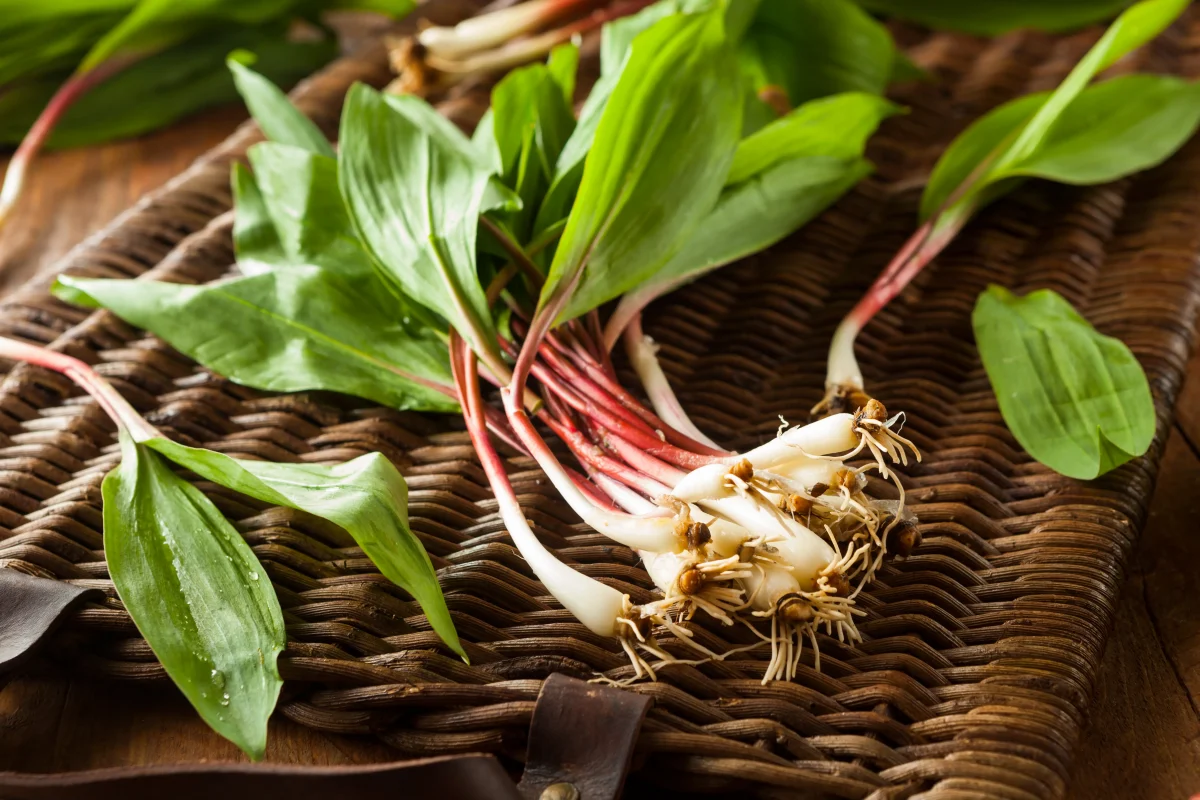
Spring is Ramp season! These mild oniony, garlicky plants are as tasty as they are rare, only appearing for a brief window in early Spring. They’re well worth the wait though! They’re perfect prepared most ways but utilizing a preservation recipe like this pesto makes for a topping that can be enjoyed after Spring is over.
Chef Andrew has shared a very easy to make Grilled Ramp Pesto recipe. This pesto is perfect atop grilled meats or bruschetta. Enjoy!
Grilled Ramp Pesto
Ingredients
- 1 bunch ramps cleaned
- 1 tsp pickled ramps
- ¼ cup EVOO
- 1 oz aged New York state cheddar
- 2 tbs toasted sunflower seeds
Method
- Toss cleaned ramps in 1 tsp olive oil and salt to taste. Then on a grill or grill pan grill ramps till they take on a lite charr and soften.
- Place into a mixing bowl and cover with plastic and allow to steam.
- Once the ramps have steamed roughly chop and place in food processor with all remaining ingredients.
- Blend until all ingredients are thoroughly incorporated season to taste. Store for up to four days in a sealed container.


